

The sheet pan of marinated chicken has been sitting on the counter in a Chandler kitchen since two o’clock, the control panel reads 400 degrees, and the display already chimed that preheat finished. Then the door opens and the cavity feels barely warmer than the room. The bake element never glowed once. Dinner is an hour behind schedule, someone has already said the word pizza out loud, and an oven not heating up on a Saturday afternoon turns a simple family meal into a scramble.
Cold Oven? Get It Diagnosed and Back to Baking
Our factory-authorized technicians service ovens across the Phoenix metro, and our showrooms carry wall ovens ready for same-week installation. Repair it or replace it, we handle both.
Here is the part that should take the edge off tonight: a cold oven is almost always one small, findable failure rather than a dead appliance. At Spencer’s TV & Appliance, our service team works on these every week across the Valley, and the same short list of parts is responsible for the overwhelming majority of calls. This guide walks through the free checks worth running in the next two minutes, the specific parts that fail on electric ovens, what goes wrong on gas ovens, a symptom-to-cause chart with real repair cost ranges, how to fix an oven that heats but never reaches temperature, and how to decide when a repair stops making financial sense.
Key Takeaways
• Four parts cause most no-heat failures: The bake element, the oven temperature sensor, the thermal fuse, and the gas igniter account for the bulk of service calls. Everything else is far less common.
• Check the breaker before anything else: An electric range or wall oven runs on a double-pole 240-volt breaker, so one tripped leg leaves the clock and controls working while the elements stay stone cold.
• A working cooktop means nothing: Surface burners have their own ignition, so a hot cooktop with a cold oven is normal behavior for a failed igniter or bake element.
• Self-clean is a common trigger: The extreme cavity temperature of a high-heat clean cycle is a leading cause of blown thermal fuses and failed control boards, which is why no-heat calls spike right after one.
Oven Not Heating Up? Run These Fast Checks First
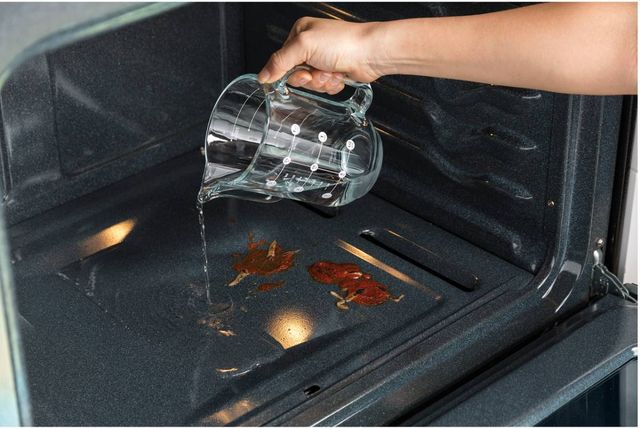
Before anyone orders a part, run the same short sequence a technician runs when walking into the kitchen. These cost nothing and solve a surprising number of calls.
1. Confirm the appliance is fully plugged in and the cord has not been pulled loose behind the range.
2. Go to the breaker panel and cycle the oven breaker fully off, then back on.
3. Check the display for a lock icon and turn off control lock or child lock.
4. Cancel any delay start, timed bake, or Sabbath mode that is still queued.
5. Verify the selected mode is Bake, not Warm, Proof, Broil, or Air Fry.
6. Close the door until it latches completely and confirm it is not still locked from a self-clean cycle.
7. On a gas model, confirm the shutoff valve behind the appliance is open and other gas appliances in the home are working.
The 240-Volt Detail Most Guides Skip
This is the check that trips up the most people. An electric oven runs on a double-pole breaker that carries two 120-volt legs. The clock, lights, control panel, and even the cooling fan only need one of those legs. The heating elements need both.
So when a single leg trips or a breaker partially fails, everything lights up normally and nothing gets hot. The oven looks perfectly alive. That is why cycling the breaker firmly all the way off and back on belongs at the top of the list rather than the bottom.
Settings That Perfectly Imitate a Broken Oven
Showroom or demo mode is the sneaky one. It sometimes gets left enabled after delivery, and the oven will accept every button press while never sending power to the elements. Control lock, a queued timed bake, and Sabbath mode all produce the same illusion of a working appliance that refuses to heat.
Door latch problems belong in this group too. The bake cycle will not start unless the door switch reports the door as closed, and a door still locked from a self-clean run stays cold until the cavity cools and the latch releases.
One safety line before going further: if there is any smell of gas at all, stop troubleshooting, open windows, get everyone out, and call for service.
Four terms carry through the rest of this article. The bake element is the heating coil at the bottom of an electric cavity. The broil element is the coil at the top. The igniter, on a gas oven, is a glow bar that heats up to open the gas valve and light the burner. The oven temperature sensor is the thin metal probe at the rear of the cavity that tells the control board how hot things actually are.
Read more:
Dryer Not Heating? 7 Causes and How to Fix
What is a Convection Oven & How Does It Work?
Why an Electric Oven Is Not Heating Up: The Parts That Fail Most
Shut the power off at the breaker before you inspect, touch, or test anything inside the cavity. An electric oven carries 240 volts, and there is no safe way to poke around a live terminal block.
Bake Element Failure
This is the number one cause, and it is also the easiest to confirm. Set the oven to bake at 350 and watch the coil at the bottom of the cavity. A healthy element starts glowing dull orange within a minute or two. A dead one never glows at all.
Look closely for blisters, cracks, a swollen spot, or a clean burned-through break in the coil. Any of those is a confirmed failure. If the broil element at the top heats normally and the bake element does nothing, the problem is almost certainly the bake element itself or the control relay that feeds it.
Hidden Bake Elements You Cannot See
Many newer ranges and wall ovens use a hidden bake element mounted underneath the oven floor. It makes the cavity easier to wipe out, and it makes visual inspection impossible. There is no glow to watch for.
On those models the only real answer is a continuity test at the element terminals, which means pulling the back panel or the oven floor. That is where most homeowners hand it off.
Oven Temperature Sensor Problems
The sensor is a thin probe, usually mounted high on the rear wall of the cavity. Here is the benchmark most articles leave out: a healthy sensor reads roughly 1,100 ohms of resistance at room temperature, and the resistance climbs steadily as the cavity heats. A reading wildly off that number points at the sensor.
A sensor can also be perfectly functional and still cause trouble. If it has been bent backward into contact with the cavity wall, it reads the metal instead of the air, and the control board gets bad information the whole time. Straightening it back to about a half inch of clearance sometimes fixes an oven that has been baking badly for months.
Thermal Fuse or Thermal Limit Switch
The thermal fuse is a one-time safety device. When cavity temperature climbs past its limit, it opens permanently and cuts power to the heating circuit. It does not reset, and there is no button to press.
Self-clean cycles are the usual culprit, since they push the cavity well above normal cooking temperatures. If your oven worked fine until the clean cycle finished and has been dead ever since, a blown thermal fuse is the leading suspect.
Incoming Power and the Terminal Block
Normal supply at the terminal block measures somewhere between roughly 210 and 240 volts. Anything meaningfully below that starves the elements, producing weak heat or none at all.
Power wires tend to fail right where they run closest to the heat, and the damage is usually visible: browned insulation, scorch marks, or a discolored connector at the block. This is technician territory, both because of the voltage and because a burned block often means the wiring behind it needs attention too.
Electronic Control Board and Relay
The control board switches power to the elements through relays. When a relay welds shut or burns open, the symptoms are distinctive:
• The oven broils but will not bake, or the reverse.
• Heating works intermittently and quits without a pattern.
• The display throws an error code.
• The oven ignores the set temperature entirely.
A shorted relay usually leaves a visible burn mark or a scorched ring on the board itself. Boards are the most expensive common failure, which is exactly why a proper diagnosis matters before ordering one.
To be plain about the split: a homeowner with a multimeter can reasonably test a visible bake element, check a temperature sensor’s resistance, and inspect a door switch. The terminal block, the control board, and anything involving gas belong with a trained technician.
Gas Oven Not Heating Up: Igniter, Safety Valve, and Supply Issues
There is a reason so many people search for a gas oven that will not bake while the cooktop works fine. The two systems are independent. Surface burners use their own spark ignition or a standing pilot, and the oven burner has its own separate igniter. A hot cooktop with a cold cavity is textbook behavior for a failed oven igniter, not a coincidence.
The Glow Bar Igniter
The glow bar igniter is the single most frequent gas oven failure, and it comes with a useful timing rule. Set the oven to bake and watch through the bottom drawer or the oven floor vent. The igniter should begin glowing within about 30 seconds and the burner should light within roughly 30 to 90 seconds total.
Now the part that fools people. An igniter that glows brightly but never lights the burner is still a failed igniter. Glow bars work by drawing enough current to open the gas safety valve, and as they age they weaken. It looks like it is working perfectly while no longer pulling the amps the valve needs, so it gets replaced even though it lights up.
The Gas Safety Valve
The safety valve is what the igniter has to trigger. It stays closed until the igniter proves it is hot enough, which is the safety mechanism keeping raw gas out of a cold cavity.
Valves do fail, but far less often than igniters. Any technician who replaces a valve before ruling out the igniter is guessing, and valve replacement is not homeowner work under any circumstances.
Spark Ignition Models
Some gas ovens use electronic spark ignition rather than a glow bar. The symptom set is completely different: you hear repeated clicking with no flame. That usually points to a dirty or misaligned electrode, moisture in the ignition area, or a failed spark module.
Supply and Setup Problems
When the ignition system checks out, look at what is feeding it:
• A shutoff valve behind the range left partially closed after a repair or a move.
• A pressure regulator problem starving the burner.
• Burner ports blocked by grease, spilled food, or rust flakes.
• An incorrect liquid propane conversion left on a natural gas appliance, or the reverse.
Here is the point competitors skip constantly. A gas oven still needs 120-volt power for its igniter, control board, and display. Pull the cord or trip the breaker and a gas oven goes just as cold as an electric one. Check power first, even on gas.
Where the line sits: gas line work, valve replacement, regulator adjustment, and anything involving a gas smell belongs with a licensed technician. Full stop.
Oven Not Heating Up Symptom Chart: Likely Cause, Fix, and Cost
Find the row that matches what your oven is actually doing, then read across. This turns everything above into a quick diagnostic.
| Symptom | Likely Cause | Oven Type | Typical Fix | Homeowner or Technician | Typical Repair Cost Range |
|---|---|---|---|---|---|
| Display works but no heat at all | Tripped breaker leg, bake element, or thermal fuse | Electric or gas | Cycle the breaker, then replace the failed part | Homeowner for the breaker, technician for parts | $0 to $400 |
| Broil heats but bake does not | Bake element or control board relay | Electric | Replace the element or the control board | Technician | $150 to $600 |
| Element never glows red | Burned-out bake element | Electric | Replace the bake element | Homeowner with a multimeter | $150 to $400 |
| Oven heats but never reaches the set temperature | Sensor drift or calibration offset | Electric or gas | Recalibrate first, then replace the sensor | Homeowner for calibration | $0 to $300 |
| Preheat takes far longer than normal | Weak element, failed door gasket, or blocked vent | Electric or gas | Replace the gasket or the element | Homeowner for the gasket | $100 to $400 |
| Igniter glows but the burner never lights | Weakened glow bar igniter | Gas | Replace the igniter | Technician | $150 to $350 |
| No heat immediately after a self-clean cycle | Blown thermal fuse or stuck door latch | Electric or gas | Replace the thermal fuse or latch motor | Technician | $120 to $300 |
| Oven heats then shuts off mid-bake | Failing sensor, relay, or overheating control | Electric or gas | Test the sensor, then replace the board | Technician | $200 to $600 |
| Error code shown on the display | Control board or sensor circuit fault | Electric or gas | Read the code, then replace the failed part | Technician | $250 to $600 |
Those figures are national parts-plus-labor averages and they move with brand, part availability, and whether the unit is a freestanding range or a built-in wall oven, since built-ins take longer to pull and reinstall. Once you have found your row, jump back to the matching section above for the full diagnosis.
Oven Heats but Never Reaches Temperature: Calibration and Sensor Drift
A partial failure is a different problem than a dead oven, and it deserves its own treatment. Cookies burning on the bottom, a roast that takes 90 minutes longer than the recipe says, cakes that never set in the middle. The oven works. It just lies about how hot it is.
Verify It Before You Fix It
Put a standalone oven thermometer on the center rack, set the oven to 350, and let it run a full preheat plus another 10 minutes to stabilize. Then compare the reading to the setting. Most manufacturers consider a swing of about 25 degrees in either direction to be normal cycling behavior, so a reading of 335 or 370 is not a defect.
Take three readings at different setpoints if you can. A consistent offset across all of them means calibration. A gap that grows as temperature rises usually means the sensor.
Use the Calibration Offset
Nearly every electronically controlled oven built in the last two decades has a built-in calibration adjustment, and almost nobody uses it. It shifts the entire temperature curve up or down, typically in a range of about 35 degrees either way.
Look up the exact key sequence in your owner’s manual rather than guessing at button combinations, because the procedure differs by brand and by model year. And know the limit: an oven running more than roughly 50 degrees off its setting has a sensor or control problem, and dialing in an offset only hides it.
Heat That Escapes and Air That Cannot Move
Sometimes the oven produces plenty of heat and loses it. Check the door first, since it is the largest opening in an insulated box:
• A door gasket that is torn, flattened, or missing a section.
• Sagging hinges that let the door sit crooked in the frame.
• A warped door that no longer pulls flush against the seal.
• A failed door switch, which can prevent the bake cycle from running at full output.
Airflow problems produce a similar result. Foil or an oven liner laid across the oven floor blocks the bottom vents and starves the cavity. Overcrowded racks stop convection from circulating. A convection fan that no longer spins turns a convection bake into a slow, uneven one. A blocked rear vent traps moisture that keeps food steaming instead of browning.
What Normal Preheat Actually Looks Like
A conventional oven needs roughly 10 to 15 minutes to reach 350 degrees. Convection cuts that noticeably. Larger cavities take longer than smaller ones, simply because there is more air and more steel to heat.
Plenty of slow-preheat complaints turn out to be correct behavior on a big oven, particularly for someone who upgraded from a smaller unit and expects the old timing.
The Phoenix Factor
Valley kitchens add wrinkles other guides never mention. A 115-degree afternoon means your air conditioning is running nearly nonstop, and in older Phoenix and Glendale homes the kitchen circuits and the AC compressor sit closer together on the panel than anyone would design today. Heavy simultaneous load can pull voltage down, and low voltage means weak heat.
Monsoon season brings the other issue. Brownouts and voltage sags during a storm can scramble an oven control board, wipe a stored calibration offset, or throw an error code out of nowhere. If your oven started misbehaving the same week a storm knocked the power out, that timing is a real clue rather than a coincidence.
Fixing an Oven Not Heating Up Yourself: Pros and Cons
Some of these repairs are genuinely reasonable weekend projects. A visible bake element on a freestanding electric range is usually four screws and two wire connectors. A door gasket is often no tools at all. Others put you inches from a live 240-volt terminal block or an open gas line, where the downside is not a wasted afternoon. Knowing which category your repair falls into is the whole decision.
Pros
You skip the labor charge
Labor is typically the larger half of a repair bill, so handling a simple part swap yourself can cut the total cost by more than half.
Same-day resolution on common parts
Bake elements and glow bar igniters are among the most widely stocked appliance parts anywhere, so a straightforward fix does not have to wait on a service window.
Parts availability is genuinely good
Elements, igniters, sensors, and thermal fuses for mainstream brands are easy to source by model number, and most ship with the wiring adapters included.
You learn your own appliance
Homeowners who have opened the back panel once tend to catch the next problem earlier and describe symptoms accurately when they do call for service.
Cons
Real shock and gas hazards
A 240-volt circuit and a live gas line are not forgiving of a mistake, and a partially closed valve or a loose connector can create a problem far bigger than a cold oven.
Warranty and misdiagnosis risk
Owner repairs can void manufacturer or extended warranty coverage, a wrong diagnosis means paying for a part that was never the problem, and connected ovens often need their replacement control board programmed to the appliance before anything works.
Read more:
Is It Time for a New Fridge? Refrigerator Repair vs Replace Explained
How Much Should Appliance Repair Cost? A Pricing Breakdown
Repair or Replace: When an Oven Not Heating Up Is Not Worth Fixing
Use a simple rule and the decision gets much easier. When the repair quote approaches half the price of a comparable new unit, replacement is usually the better use of the money. Frame that against a realistic service life of roughly 13 to 15 years for a range or wall oven, then ask how many years the repair is buying.
A $200 igniter on a six-year-old oven is easy math. A $550 control board on a fourteen-year-old wall oven with a rusting cavity is a different conversation.
Signals That Point Toward Replacement
• The same part has failed more than once in a couple of years.
• The control board is discontinued, back-ordered, or only available refurbished.
• The cavity shows rust, cracked porcelain, or a burned-through floor.
• The door seal has failed on a unit already past a decade of service.
• Multiple faults show up at once, which usually means several parts are near the end together.
Fit and Installation Realities Buyers Overlook
Replacing a built-in is a measuring project before it is a shopping project. Wall oven cutout height, width, and depth all have to match, and a 30-inch nominal opening is not a guarantee that any 30-inch oven drops in. Single versus double configurations change the required opening entirely. Slide-in and freestanding ranges are not interchangeable either, since a slide-in expects finished countertop on both sides.
Then there is the utility question. Confirm what is already behind the appliance, because adding a 240-volt circuit or running a new gas line turns a simple swap into an electrical or plumbing job.
Here is the detail our installers plan around on every built-in job: the oven’s electrical junction box has to stay accessible after the unit is in place, which normally means an access opening in the cabinet behind or below the oven. Seal that up during a remodel and the next technician has to pull the entire oven out of the wall just to check the connections.
What the Upgrade Actually Buys You
Being honest about this matters, because not every new feature earns its keep. The ones that do:
• Faster preheat, with many current models reaching 350 degrees noticeably quicker than a decade-old unit.
• True convection with a third heating element, which bakes far more evenly across multiple racks.
• Air fry and steam functions that replace a countertop appliance instead of adding one.
• Tighter temperature holding, so a recipe behaves the way it was written.
• Fresh warranty coverage, which resets the clock on exactly the parts that fail most.
Our technicians service the entire Phoenix metro area and can diagnose the fault before you decide anything. That way the repair-or-replace call is based on a real quote for a real part rather than a guess, and if replacement wins, our team already knows what your cutout will accept.
How to Keep Your Oven Heating Reliably All Year
Prevention only counts if it targets the parts that actually fail, so this list maps directly onto the failure modes above.
Start with the highest-value habit, because it is the one that saves the most expensive repair. Do not run a high-heat self-clean cycle in the days before Thanksgiving, a holiday dinner, or a party. That cycle drives the cavity to around 900 degrees, and that heat is a leading cause of blown thermal fuses and cooked control boards. Steam clean or a manual scrub with a damp cloth carries nowhere near the risk, and if you do want a full self-clean, run it a few weeks ahead of any meal that matters.
Then stop the habits that quietly do damage:
• Lining the oven floor with foil, which blocks the bottom vents and traps heat against the element.
• Using rigid oven liners that cover the same vents.
• Letting the door slam, which knocks hinges out of alignment and flattens the gasket over time.
• Leaving spills to carbonize near the element, where they burn into hard deposits and create hot spots.
Once a year, run a five-minute check:
1. Run a finger along the door gasket looking for flat spots, tears, or brittle sections.
2. Close the door and confirm it pulls flush against the frame with even pressure all the way around.
3. Verify calibration with an oven thermometer at 350 degrees.
4. Look at the rear vent and make sure it is clear of grease and debris.
Two more worth doing. Put an electronically controlled oven behind surge protection, ideally a whole-home surge device at the panel, since Arizona storm season is hard on appliance boards. And write down any error code the moment it appears, because a code that clears itself takes real diagnostic information with it.
Finally, two safety reminders that are never negotiable. Never use an oven to heat a room. And at the first smell of gas, shut off the supply, ventilate, and call for service instead of investigating.
Log Your Oven’s Heat-Up Curve to Pinpoint the Failing Part
Most troubleshooting treats preheat as a yes or no result, and that throws away the most useful information your oven produces. Set a standalone thermometer on the center rack, start a cold oven at 350, and write down the cavity temperature every three minutes until the oven signals ready. The shape of those numbers narrows the cause faster than any single reading can, because each failure mode distorts the curve differently. A weak or partially failed element climbs slowly but steadily from the start. A door or vent problem climbs normally at first, then flattens as heat escapes as quickly as it is produced. A sensor fault produces a curve that looks fine while the display reports something entirely different. Take that log to a service call and the technician starts three steps ahead.
• A steady climb that reaches 350 in 10 to 15 minutes means your oven is healthy and the recipe or the rack position deserves the blame.
• A slow, even climb that eventually gets there points to a weakening element or low incoming voltage.
• A fast start that stalls out 40 to 60 degrees short points to heat loss at the door gasket or an airflow blockage.
• A curve that matches the thermometer but not the display points at the temperature sensor or its calibration offset.
• A climb that reverses mid-cycle, dropping instead of rising, points to a relay or control board cutting power intermittently.
• No measurable rise in 10 minutes with the display counting up normally means a dead element or igniter, and no amount of waiting will change it.
Read more:
The 7 Best Wall Ovens | Top Rated Ovens
7 Best Double Wall Oven Picks: The Perfect Pair
Wall Ovens That Preheat Fast and Hold Temperature
When a repair quote does not pencil out, this is where the search usually lands. The lineup below spans a straightforward single wall oven replacement to a premium built-in and a double oven, plus one companion appliance that buys you time while a repair is pending. Every model is available to see in person in our Phoenix metro showrooms, with local delivery, haul-away of the old unit, and professional installation handled by our own crews.
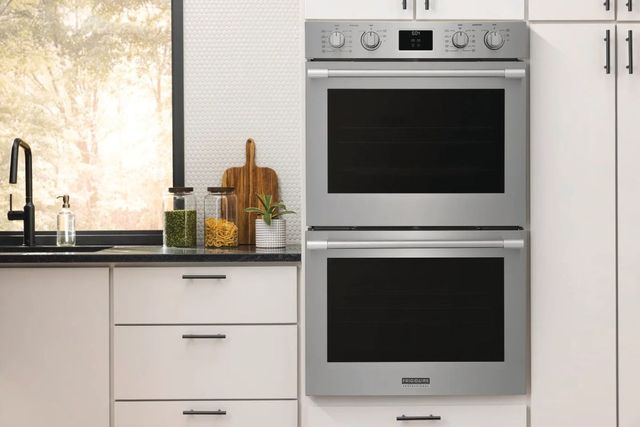
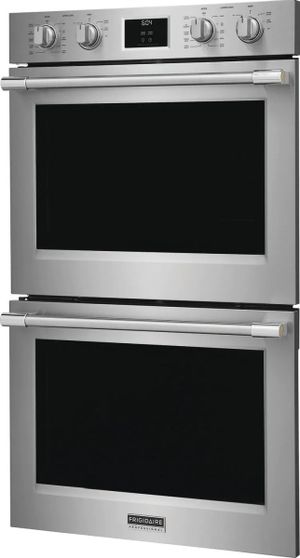
Frigidaire Professional 30” Smudge-Proof Stainless Steel Double Electric Wall Oven
Shop Built-In Electric Double Ovens
A double oven is the best insurance against the exact scenario that brought you here. Two independent cavities with their own elements and controls mean a single failure never leaves the kitchen without a working oven. That matters enormously during holiday cooking, when a roast and a pie need different temperatures at the same time anyway. The smudge-proof stainless finish shrugs off the fingerprints that a heavily used oven collects, and the Professional series build quality shows in the door seal and hinge feel. It fits a standard 30-inch cutout.
Top Features
• Two independent cavities: Separate elements and controls let you bake and roast at different temperatures at once, with built-in redundancy.
• Smudge-proof stainless steel: Resists fingerprints and streaks on the surface families touch most.
• Standard 30-inch cutout: Designed to drop into the most common built-in opening size in Valley homes.
• Professional series construction: Heavier door hardware and sealing, the parts that fail first on cheaper builds.
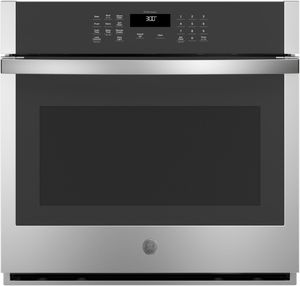
GE 30” Stainless Steel Single Electric Wall Oven
Shop Built-In Electric Single Ovens
This is the sensible one-for-one swap when a wall oven quits and you are not looking to remodel the kitchen around it. GE builds to the standard 30-inch cutout and keeps the control layout straightforward, which means no relearning how to set a timed bake. Parts support is another quiet advantage worth naming after everything above: GE components stay widely available for years, so a future element or sensor is easy to source. Our installers handle the pull-out, the junction box connection, and the level-in on the same visit.
Top Features
• Direct 30-inch replacement: Matches the most common existing cutout, so the cabinet usually needs no modification.
• Simple, readable controls: Clear bake, broil, and timer functions without a learning curve.
• Strong parts availability: Widely stocked components keep future repairs quick and inexpensive.
• Stainless steel exterior: Wipes clean and matches existing stainless appliances in the kitchen.
Café 30” Stainless Steel Electric Speed Oven

Slow preheat was one of the biggest complaints in this article, and a speed oven answers it directly. Combining convection with microwave energy, it gets food hot in a fraction of the time a conventional cavity needs, which changes weeknight cooking completely. Pair it above or below a full-size oven and you have a two-appliance wall where one unit handles quick meals and the other handles the roast. The Café design language brings a more finished look than a standard built-in, and the 30-inch width fits typical cabinetry.
Top Features
• Speed cooking technology: Combines convection heat with microwave energy to cut cooking and reheating time dramatically.
• Dual-purpose cavity: Works as a true oven and as a microwave, freeing up counter space.
• Café design details: Premium handle and trim options that read as built-in rather than added on.
• 30-inch built-in width: Stacks cleanly with a full-size wall oven in a standard tall cabinet.
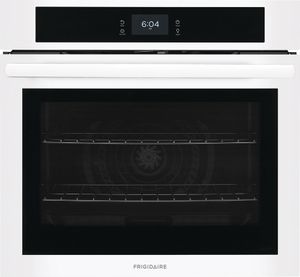
Frigidaire 30” Stainless Steel Single Electric Wall Oven
Shop Built-In Electric Single Ovens
When the math says replace but the budget says be reasonable, this is the model that solves it. A single electric wall oven at this level covers everything a household actually bakes, without paying for features that go unused. It fits the standard 30-inch opening, so the install is typically a same-visit swap rather than a cabinet project. Every new unit also resets the warranty clock on the bake element, sensor, and control board, which are precisely the parts that failed on the oven you are replacing.
Top Features
• Value-focused single oven: Delivers reliable everyday baking without premium feature pricing.
• Standard cutout compatibility: Sized for the common 30-inch built-in opening for a straightforward swap.
• Fresh warranty coverage: New parts coverage on the components most likely to need service.
• Easy-clean stainless interior surfaces: Simplifies wiping out spills before they carbonize near the element.
Monogram Statement Collection 30” Stainless Steel Warming Drawer
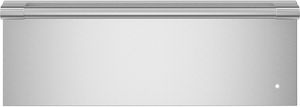
This one is not an oven fix. It is the appliance that saves the meal while you wait on a part or a delivery date, holding finished dishes at serving temperature so a grill, a cooktop, or a neighbor’s oven can carry the load. That same capability is why it earns permanent space during holiday cooking, when four dishes finish at four different times and nothing can go cold. Statement Collection styling matches Monogram ranges and ovens, and the 30-inch width fits below a wall oven or into a base cabinet run.
Top Features
• Holds food at serving temperature: Keeps finished dishes hot for hours without drying them out or overcooking.
• Holiday overflow capacity: Frees the main oven for the next dish when several courses finish at different times.
• Monogram Statement styling: Coordinates with Monogram ovens and ranges for a consistent built-in look.
• 30-inch base cabinet fit: Installs below a wall oven or into a standard cabinet run.
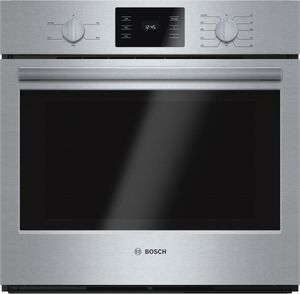
Bosch 500 Series 30” Stainless Steel Electric Built-In Single Oven
Shop Built-In Electric Single Ovens
If uneven baking and temperature drift were the frustrations that started this, Bosch is the answer worth stretching for. European convection circulates air aggressively for even results across racks, which addresses the exact heat distribution issues covered earlier. The 500 Series build focuses on the fundamentals that keep an oven out of the repair queue: a solid door seal, precise temperature holding, and a quiet, well-engineered convection system. The clean flush look suits a modern kitchen, and it fits a standard 30-inch built-in cutout for a direct replacement.
Top Features
• European convection: Circulates heated air for even browning on multiple racks at once.
• Precise temperature control: Holds the set temperature tightly so recipes behave predictably.
• Flush built-in appearance: Sits tight to the cabinet face for a clean, integrated look.
• Standard 30-inch cutout: Replaces most existing single wall ovens without cabinet rework.
Get Past an Oven Not Heating Up and Back to Real Cooking
Nearly every no-heat failure traces back to a short list of parts, and the checks that rule out the easy causes cost nothing but two minutes at the breaker panel and the control display. Match your exact symptom to a likely cause, and you know whether you are looking at a straightforward part swap or a genuine replacement decision. What you should not do is guess your way through parts orders.
Let our team settle it for you. Schedule service with Spencer’s TV & Appliance and a factory-authorized technician will diagnose your oven anywhere in the Phoenix metro area, or stop into any of our showrooms to compare wall ovens with people who actually cook on them. That combination is what an independent Arizona retailer offers and a big-box store cannot: honest advice in person, our own installers handling the cutout and the connection, local delivery with haul-away, and a service department right here when you need it years from now. An oven not heating up should cost you one dinner, not one holiday season.
Frequently Asked Questions about Oven Not Heating Up
Cooktop burners have their own separate ignition or heating circuits, so they operate completely independently of the oven cavity. A working stovetop with a cold oven usually points to a failed bake element on an electric model or a weak glow bar igniter on a gas model.
Yes, a visible bake element on most electric ranges is a reasonable homeowner repair involving two mounting screws and two wire connectors. Shut the power off at the breaker first, and hand the job to a technician if the element is hidden under the oven floor and requires a continuity test to confirm.
A conventional oven typically needs 10 to 15 minutes to reach 350 degrees, and larger cavities take longer because there is more air and steel to heat. Preheat times noticeably beyond that usually mean a weakening element, a failed door gasket letting heat escape, or vents blocked by foil or an oven liner.
A high-heat self-clean cycle pushes the cavity to around 900 degrees, which commonly blows the thermal fuse that protects the heating circuit. The fuse opens permanently and has to be replaced rather than reset, and the door latch can also stay locked until the cavity has fully cooled.
Test the sensor’s resistance with a multimeter, since a healthy sensor reads roughly 1,100 ohms at room temperature and a reading far off that value confirms the sensor. A sensor that tests correctly while the oven still misbehaves, throws error codes, or broils but will not bake points to the control board instead.
Repair makes sense when the quote is well under half the cost of a comparable new unit and the appliance is under about 10 years old. Lean toward replacement when the oven is past 13 years, needs a discontinued control board, or shows several faults at once.
Why Trust Spencers TV & Appliance?
Since 1973, Spencer’s TV & Appliance has grown to 11 locations throughout the Phoenix Metropolitan Area. The secret to our longevity is simple: personal service. Customer satisfaction has always been the focus of our business, and throughout the years, we have been able to work hard with our suppliers to bring you the best prices. After all, getting customers the best price and personal attention is how we compete with big-box stores, day in and day out.
Not only do we offer top-rated appliances, name-brand electronics, and the best mattresses on the market but we also provide water treatment solutions and perform kitchen design services. Stop by your nearest Spencer’s and see what you’re missing!
Shop Ovens at Spencers
At Spencers TV & Appliance, we provide high-quality, name-brand products at great prices. Your friends in the business are always happy to help you choose the best mattress for lower back and leg pain. Call us, or better yet, stop by at one of our locations in the Phoenix, Scottsdale, and Glendale regions. Visit us today!